Find Me On Facebook
Our Furry Friends

 ****************************
Monday, March 19, 2012
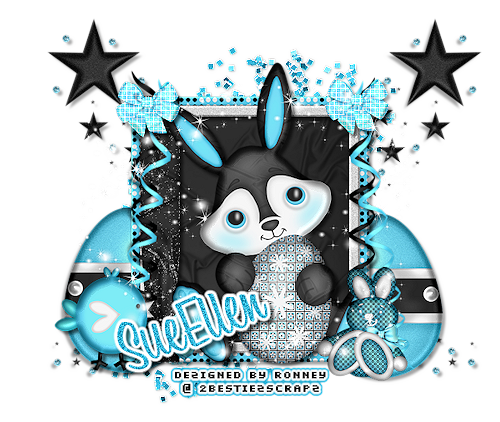
♥Emo Easter PTU ♥
**This tutorial was written & posted by Ronney @ 2BestiezScrapz**
***Any resemblance to any other tutorial is purely coincidental & completely unintentional!***
Here is what we will be making :
Supplies Needed :
Paint Shop Pro X4 (Any version should work)
Scrapkit - Emo Easter By Sue Ellen @ 2BestiezScrapz
Plugins Used :
Eye Candy 4 - Gradient Glow (Optional)
Font Used :
LHF Bounce Script
Elements Used :
Element 32
Element 21
Element 5
Element 12
Element 3
Element 8
Element 20
Element 28
Element 22
Element 24
PP10
Sparkles Of Choice
Lets Begin :
Start by opening a new 800 x 650 transparent canvas. (Don't worry you will crop off any access at the end of this tutorial :-)
Now open your Element 24 - Copy & paste it as a new layer onto your canvas - then re-size it to 50%. Using your Move Tool - position your Element24 to the center of your canvas.
Now click on your Magic Wand tool - then on your canvas - click inside of your frame (element 24)
Then go to Selections - click Modify - then click Expand. Set to 10 & click Ok.
Now go to Layers- click New Raster Layer -
Open PP10 - Copy & paste it INTO SELECTIONS.
Now go to your layers pallet - Move your PP10 layer down so that it is directly below your Frame (Element 24) layer.
Now go to Selections - click Select None.
Go back to your layers pallet - click on your Frame (Element 24) layer - then go to Adjust - click Sharpness - then click Sharpen.
Now go to Effects - click 3D Effects - then click Drop Shadow
**My settings are below - you are welcome to use them or play with them and make your own effect - the choice is always yours**
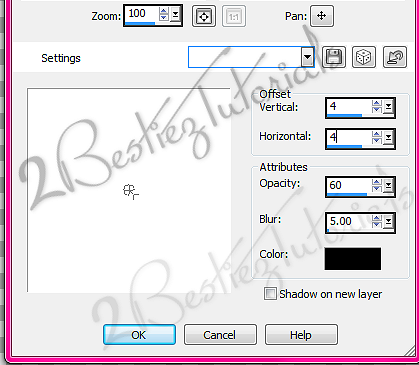
Now click Ok.
Now - Open Element 12 - Copy & paste it as a new layer onto your canvas .
Now re-size it to 70%. Using your Move Tool - position your Element12 within your frame.
Now go to Effects - 3D Effects - this time click Inner Bevel - Apply the settings below (or your own)
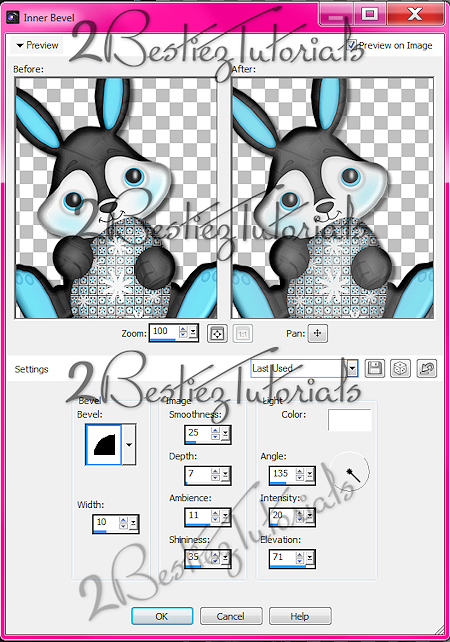
Now click Ok.
Go to your Layers Pallet - click on the last layer in your pallet -
Now open your Element 28 - Copy & paste it as a new layer onto your canvas.
Then re-size it to 80%. Using your Move Tool - position your Element 28 to your liking. (You can use my tag for reference if you would like)
Now go to Adjust - Sharpness - Sharpen
Effects - 3D Effects - Drop Shadow (This time we are going to use a SLIGHT Drop Shadow , so the settings below are different)
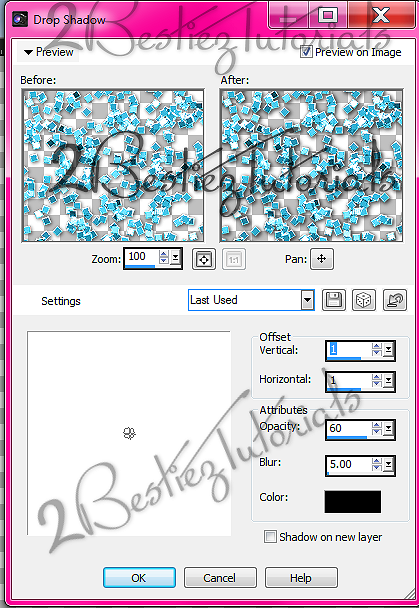
Now click Ok.
Now back in your Layers Pallet - click on your TOP layer -
Open your Element 3 - Copy & paste it as a new layer onto your canvas. Then re-size it to 50%. Using your Move Tool - position your Element 3 to the right side of your frame (Element24).
Now go to Effects - 3D Effects - then click Inner Bevel (Use same settings as above)
Then click Ok.
Now go to Adjust - click Sharpness - then click Sharpen
Go back to Effects - click 3D Effects - then click Drop Shadow. (You will want to change your settings back to what you used for your other elements.)
Then click Ok.
In your Layers Pallet - Move your Element 3 layer down so that it is directly below your PP10 layer.
Now still in your layers pallet - right click on your Element 3 layer - then click Duplicate.
Now using your Move Tool - Position your Duplicated Element 3 to the LEFT side of your canvas.
Now back in your layers pallet - click on the TOP layer in your layers pallet.
Open Element 8 - Copy & paste it as a new layer onto your canvas - then re-size it to 30%.
Go to Image - click Flip Horizontal.
Using your Move Tool - position your Element 8 to the lower right corner of your frame.
Now go to Effects - 3D Effects - Inner Bevel - Apply the exact same settings you have been using - so just click Ok.
Now go to Adjust - click Sharpness - Sharpen
Then back to Effects - 3D Effects - Drop Shadow. (Apply the same settings you used above)
Now open your Element 5 - Copy & paste it as a new layer onto your canvas.
Then re-size it to 30%.
Using your Move Tool - position your Element 5 to the lower left corner of your frame (Element 24)
Go to Effects - 3D Effects - Inner Bevel - Apply the exact same settings - so just click ok.
Now go to Adjust - Sharpness - Sharpen
Effects - 3D Effects - Drop Shadow (Same settings you have been using , so just click Ok)
Now open Element 22 - Copy & paste as a new layer onto your canvas - then re-size it to 40%, then re-size it again to 40%, then one more time to 65%.
Now using your Move Tool - position it to the right side of your Frame (Element 24)
Adjust - Sharpness - Sharpen
Effects - 3D Effects - Drop Shadow (Same settings you have been using - so just click Ok)
Now go to your layers pallet - right click on your Element 22 layer - then click Duplicate. Then go to Image - click Flip Horizontal - then using your Move Tool - position your Duplicated Element 22 to the right side of your Frame (Element 24)
Now open Element 21 - Copy & paste it as a new layer onto your canvas - then re-size it to 40%, then re-size it again to 40%, then again to 65%.
Now go to Image- click Free Rotate - (Use settings below - or your own)
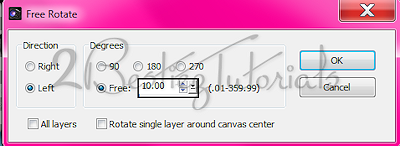
Then click Ok.
Adjust - Sharpness - Sharpen
Effects - 3D Effects - Drop Shadow (Same settings as before, so just click Ok)
Now go to your layers pallet - right click on your Element 21 layer - then click Duplicate.
Now go to Image - click Flip Horizontal - then use your Move Tool to position your Duplicated Element 21 to the right side of your Frame (Element 24)
Now open Element 20 - Copy & Paste it as a new layer onto your canvas - then re-size it to 20%. Using your Move Tool - position your Element 20 to the upper Right corner of your Frame (Element 24).
Adjust - Sharpness - Sharpen
Effects - 3D Effects - Drop Shadow (Same settings, so just click Ok)
Now go to your layers pallet - right click on your Element 20 layer - then click Duplicate. Now using your Move Tool - position your Duplicated Element 20 to the Left Side of your Frame (Element 24)
Now go to your layers pallet - click on your Element 24 (Frame) layer -
Now open your Element 32 - Copy & paste it as a new layer onto your canvas - then using your Move Tool - Position your Element 32 to your liking. (See my tag for reference if needed)
Now go to Adjust - Sharpness - Sharpen
Effects - 3D Effects - Drop Shadow (Apply a SLIGHT drop shadow to this element)
(Don't mind the pic in this screen shot, all you need is the settings :-)
Then click Ok.
Now go to your layers pallet - right click on your Element 32 layer - then click Duplicate.
Go to Image - click Flip Horizontal. Now use your Move Tool to adjust the position of your Duplicated Element 32.
Now if you would like to add any sparkles you may do that at this time. (These are not included in the kit, but if you have some you can add them)
Now add the name you would like on your tag. My settings are below :
Font : LHF Bounce Script
Size : 80 Pixels (This can be adjusted to your preference)
Foreground Color : Set to Nul
Background Color : #2bb2d7
Once you have your name where you would like it, go to your layers pallet - right click on your Name layer - then click Convert To Raster Layer.
Then go to Adjust - Add/Remove Noise - then apply the settings below :
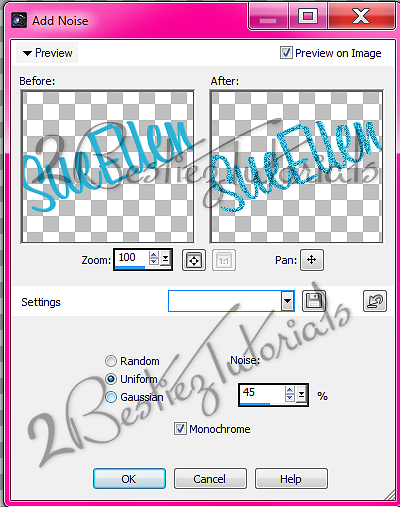
Now click Ok.
Then go to Effects - click Plugins - then click Eye Candy 4 - then click Gradient Glow
**You can use my settings below or your own. Don't forget to click your Basic & Color tabs to set everything**
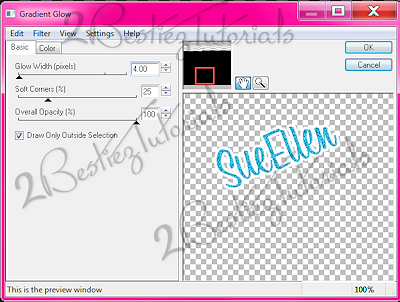
Then click your Color Tab :
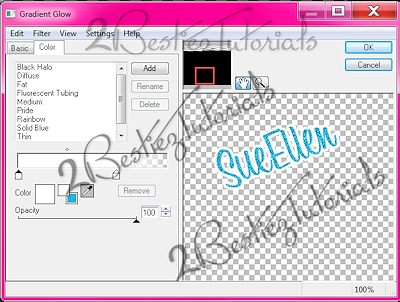
Then click Ok.
Now go to Effects - 3D Effects - Drop Shadow. Apply the settings below :
Then click Ok.
Now if you are happy with the placement of your elements & name - go to your layers pallet - right click on any layer - then click Merge - then Merge Visible.
Now activate your Crop tool by clicking on it - then crop off any access canvas that you did not use.
Once you have your tag cropped you may or may not want to re-size it. That is completely up to you & where you will be using your tag & what that websites preferences are.
If you do re-size your tag - I always like to apply one last Sharpen, just to keep it from looking fuzzy.
Now all that is left is to Save your tag as a PNG file & you have completed this tutorial!!♥
Subscribe to:
Post Comments (Atom)
Our Blinkies
♥If you would like to purchase any of our kits, please click the blinkie below♥
*****************************
 *****************************
♥We would also love for you to display our Tutorial blinkie, so others can find our tutorials as well♥
*****************************
♥We would also love for you to display our Tutorial blinkie, so others can find our tutorials as well♥
 *****************************
*****************************
♥We would also love for you to display our Tutorial blinkie, so others can find our tutorials as well♥
*****************************
Today's Date
****************************

Our Personal Blogs
♥If you would like to take a peek at some of our personal work, for other scrappers, please click on the blinkies below. ♥
 ******************************
 ******************************
******************************
******************************
0 comments:
Post a Comment